Guest post by Luke from Ad Badger
Amazon advertising is the best platform for anyone trying to sell a product. Don’t believe me? Let’s take a look at the numbers.
In 2019, over $229 billion worth of merchandise was sold on Amazon, equating to almost half of all ecommerce sales in the United States. What’s even better than these numbers? Amazon is projected to keep growing their market share and sellers are flocking to the platform every day by the thousands.
Clearly Amazon presents a great opportunity, and it’s time for you to get started with Amazon PPC.
Amazon Advertising Basics
Amazon advertising primarily uses a pay-per-click (PPC) model for its ads. That means you pay when someone clicks on your ad, as opposed to paying when your ad appears in a search (CPM model).
When it comes to bids, Amazon has an auction-style format for determining what ads appear for a particular search. Amazon PPC is an auction where sellers bid on certain keywords. Obviously, higher bids are preferred to lower bids, but there’s more to the equation.
Amazon also factors in your ad’s performance to determine how it stacks up to your competition. This performance metric is called Ad Grade. The exact formula Amazon uses to determine Ad Grade is unclear, but there are some clear performance metrics and relevance metrics that factor in.
![]()
To find your Ad Rank, multiply your bid by your Ad Grade. With a high Ad Grade, you can potentially have a lower bid than your competitors and still be valued more by Amazon.
Amazon PPC Ad Types
When creating your first Amazon PPC campaign, you’ll have to decide which type of ad you want to use.
Amazon has three ad types:
- Sponsored Products
- Sponsored Brands
- Sponsored Display
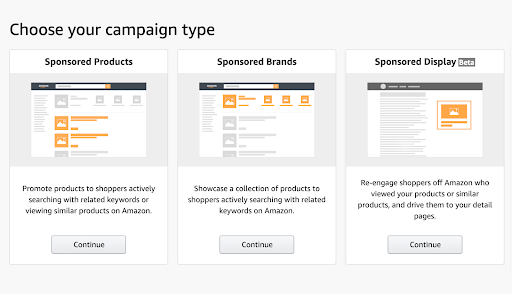
Each ad type can be effective, but for this post, we’re going to focus on Sponsored Products because this ad type offers sellers the best return on ad spend and is easy for beginners to manage.
Sponsored Products
When someone makes a search on Amazon, the first two or three products that appear at the top of the SERP (search engine results page) will have a small “Sponsored” badge above the product title. These are Sponsored Products.
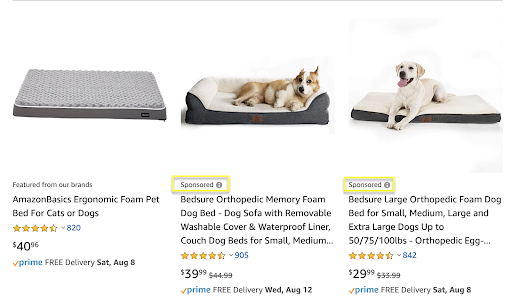
For certain searches, Amazon makes an item that fits the search criteria. In these instances, Amazon puts its AmazonBasics product at the top of the SERP followed by Sponsored Products.
Building a Sponsored Products Campaign
To build your first Sponsored Products campaign, select the ad type and then consider which type of targeting you want to use. Amazon has two targeting methods: automatic and manual.
We’ll dig deeper into those later.
You will also need to set a daily budget, the amount of time you want the campaign to run, and organize your campaigns by adding a campaign name. You can also make a portfolio where multiple campaigns can be grouped together for organizational purposes.
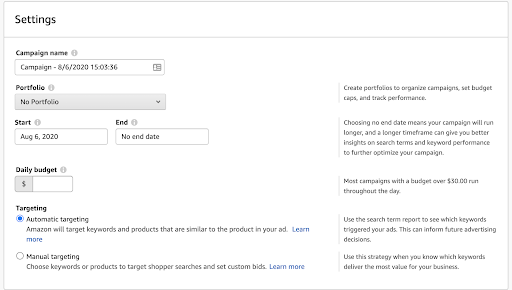
You will also need to determine your campaign bidding strategy. If you want to give Amazon the ability to raise and lower your bids, use dynamic up and down bidding. If you’re only comfortable with Amazon lowering your bid, select down only bidding. The final option is fixed bidding where Amazon won’t change your bid.
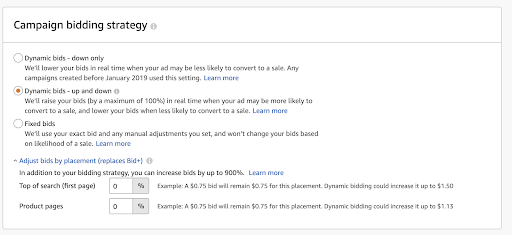
You can also adjust your bids by placement. That means you’ll pay different amounts based on where your ad is shown on Amazon. Learn more about adjusting bids by placement.
Targeting Options for Sponsored Products
Everything else on this set-up page is dependent on which targeting type you choose. Amazon has two types of Sponsored Product campaigns, automatic and manual. These two campaign types offer very different targeting options.
1. Automatic Targeting
Automatic campaigns, or auto campaigns, give Amazon the ability to select the keywords that your ad will appear for. Amazon tries to choose keywords that match up with your product’s category, related products, and keywords in your product’s title and description.
Auto campaigns can be a great tool for all sellers, but they are essential for beginners because they offer:
- Easy set-up
- Data collection
- Low risk of making a critical mistake
Every beginner should start with an automatic campaign. We frequently see sellers create their first campaign and try to pick their keywords manually. What happens? They see their ad spend go down the drain because the keywords they thought were high quality turned out to be nothing more than a waste of money.
Automatic campaigns also keep beginners away from the cardinal sin of Amazon PPC: Keyword dumping. Sellers who take hundreds of keywords from a keyword generator or another tool and throw them all in a campaign are keyword dumping.
This strategy never works, and it’s why we recommend everyone use automatic campaigns, no matter your experience level. Auto campaigns are great for data collection and research, and there’s no sense in using untested keywords when an automatic campaign can take the guess-work out of the equation.
There are some drawbacks to automatic campaigns. For starters, you have less control over your campaign and are relying on Amazon’s A9 algorithm to find relevant keywords. You’re bound to end up spending on irrelevant keywords.
It would be awesome if you could tweak your automatic campaigns to limit the number of irrelevant keywords. Oh wait, there is!
After creating your campaign, you can change the bid on each targeting group.
What’s a targeting group?
Amazon has three targeting groups for automatic campaigns. To better understand how they work, let’s say we’re selling Nike running shoes.
- Close match – Our product would show up for a search for “Nike shoes.”
- Loose match – Our product would appear for the search “athletic gear.”
- Compliments and substitutes – Our product would appear in front of shoppers who looked at similar products or our direct competitors.
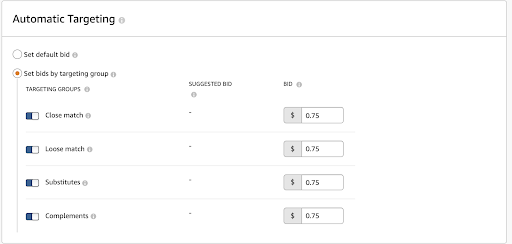
If you don’t want to change these groups, you can always stick with the default bid.
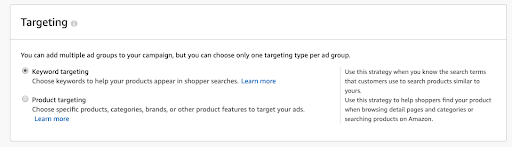
2. Manual Targeting
Manual campaigns allow sellers to pick the keywords and products they want to target. This gives you total control over what you’re bidding on.
When first creating a manual campaign, you have to choose between targeting keywords or products.
Manual Keyword Targeting
On the surface, manual keyword targeting seems pretty straightforward. You make your selections, set your bid, and away you go. Right? Well, the “away you go” part always surprises new sellers because it can be a headache.
If you don’t have a clue when it comes to choosing keywords, use an auto campaign. Don’t keyword dump and get started on the wrong foot.
For manual keyword targeting, there are three match types:
- Broad match: Contains all the keywords in any order and includes plurals, variations and related keywords.
- Phrase match: Contains the exact phrase or sequence of keywords.
- Exact match: Exactly matches the keyword or sequence of keywords.
Product Targeting for Manual Campaigns
When using manual campaigns, you can also target specific products. This is also known as ASIN targeting. An ASIN is an Amazon Standard Identification Number that every product on Amazon has. Product targeting lets you follow a specific product and have your ad appear wherever that product appears.
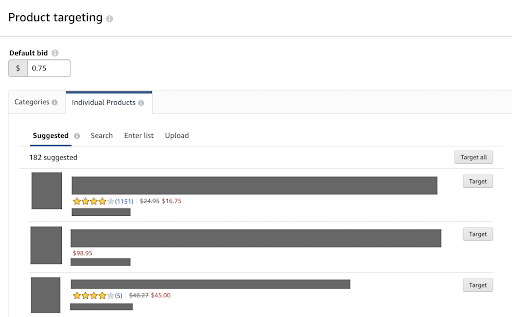
Let’s say you’re Puma, and you’ve got a t-shirt that is similar to a shirt made by Nike. With product targeting, Puma can have a Sponsored Product ad appear for its shirt whenever an ad or organic search shows that specific Nike shirt.
You can also use product targeting to latch on to products in a specific category. If you’re in the natural supplements space, you can simply select that category and you will be able to follow your competitors.
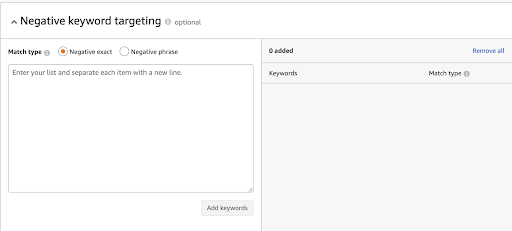
3. Negative Targeting
Now that we’ve covered the basics of “pro-targeting,” let’s dive into negative targeting. Negative targeting lets you block certain keywords and products so your product doesn’t appear in searches for those words and alongside those products.
Using negative keywords is an easy way to ensure you’re not appearing in irrelevant searches, and this can be done for automatic and manual campaigns. If you’re launching an automatic campaign for protein supplements, you don’t want your ad to show up in a search for fish oil pills, so a negative keyword would be very helpful.
When first getting started, identifying irrelevant keywords can be difficult. After seeing the results of your first automatic campaign, you can see where your ad isn’t performing well and start blocking keywords and ASINs. This is the foundation for our RPSB model.
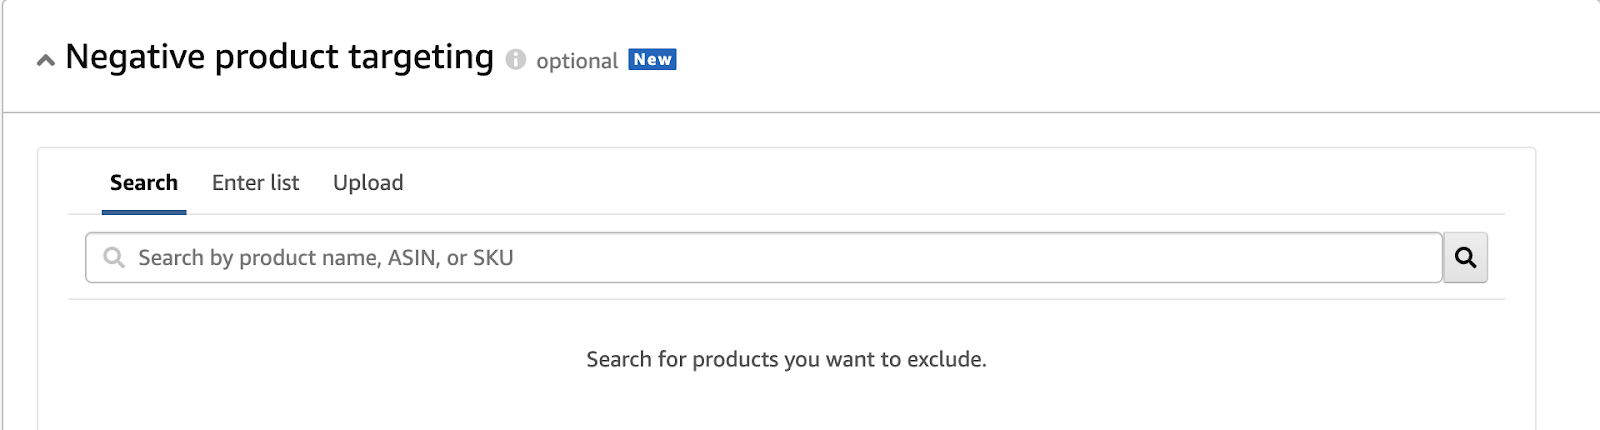
Negative product targeting allows you to block individual products. That means if you have a campaign geared towards poaching your competitors’ potential customers, you can block your ad from showing up next to your own products.
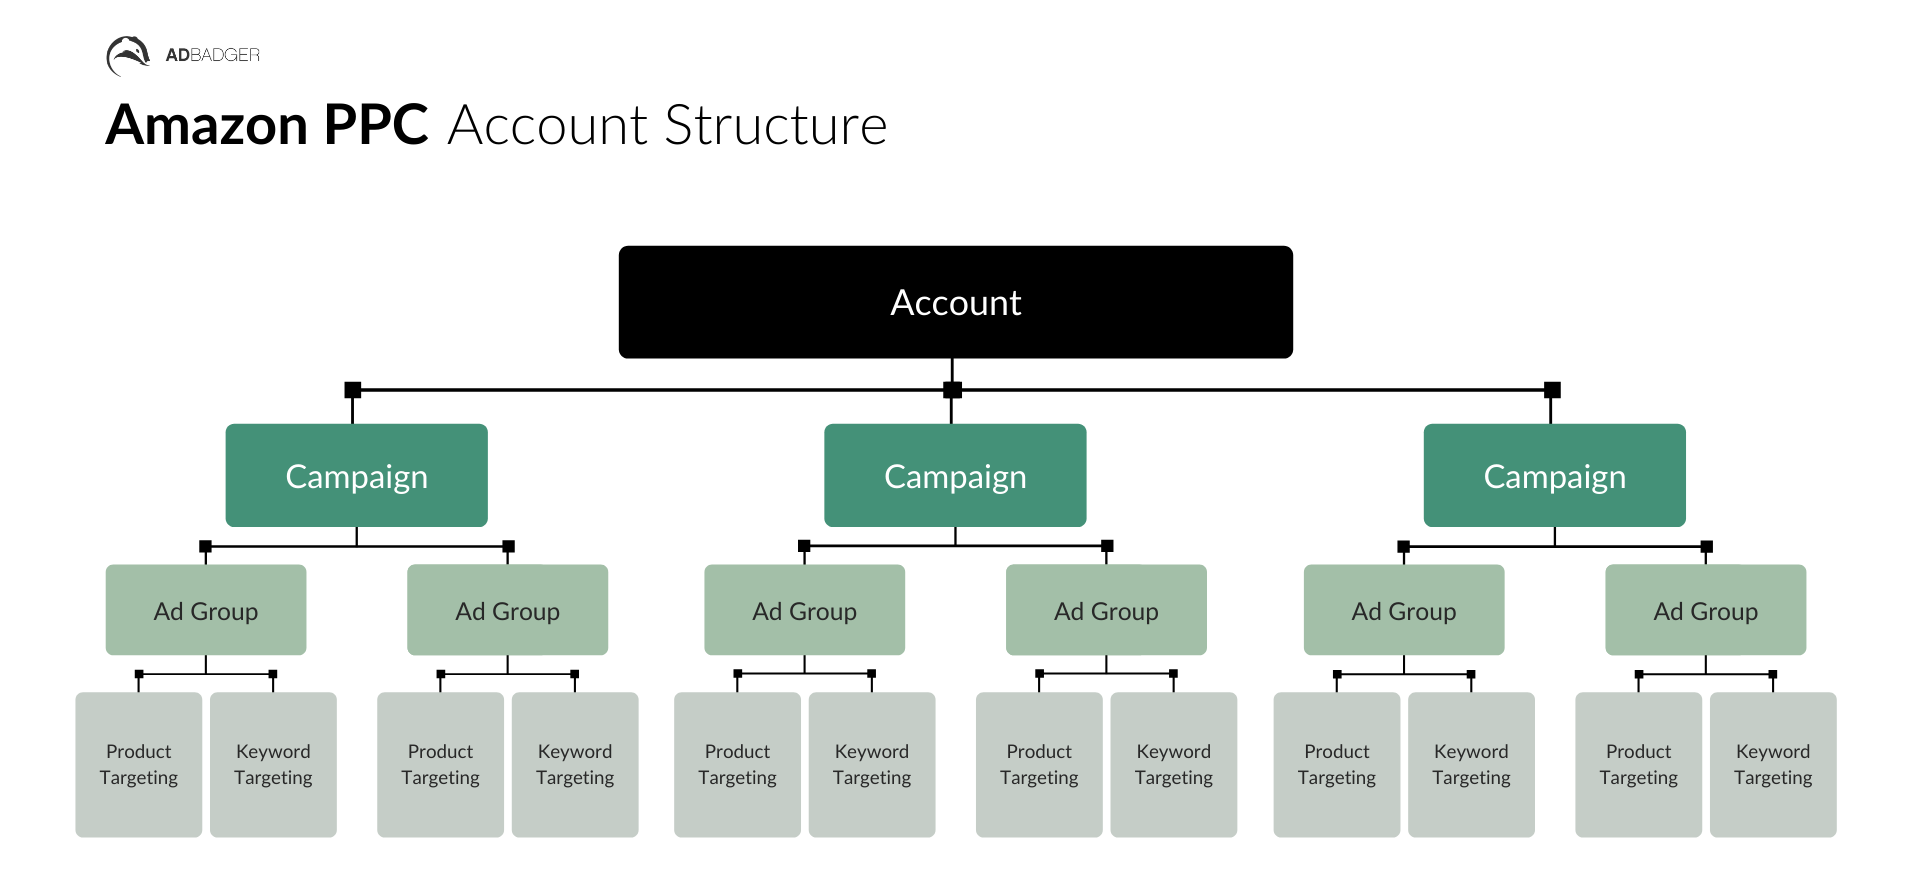
Ad Groups
Rounding it out with negative targeting, we’ve covered all the essentials at the campaign level. Now, let’s take a look at ad groups.
Ad groups allow sellers to be more specific with their targeting inside of a campaign. You can group together similar products to help with the organization of your campaign and then set targeting parameters for that ad group.
This can be a little confusing, so here’s the basic structure of an Amazon PPC account:
Other Types of Amazon Ads
We’ve touched on the essentials of Sponsored Product ads, but there are two more ad types to go over. Sponsored Brands and Sponsored Display ads can be incredibly effective, but they don’t offer the same value to a new seller that Sponsored Products provides.
Sponsored Brands
Sponsored Brand ads are similar to Sponsored Products, but instead of showing one product on a particular search, they allow sellers to showcase multiple products or their brand in general.
Sponsored Brands are very effective, but they are also extremely competitive. This competition is the main reason why we recommend new sellers ease into using Sponsored Brand ads.
Sponsored Display
Sponsored Display ads are the “new kid on the block” in the Amazon advertising world. These ads can appear on Amazon or on any site owned by Amazon. That means you aren’t just targeting keywords or products, you’re targeting audiences.
The most confusing part of Sponsored Display ads is that, in certain cases, Sponsored Display ads don’t follow the PPC model. The metrics for Sponsored Display ads are also different from the other ad types. For these reasons, we caution new sellers about jumping straight into Sponsored Display ads.
Final Thoughts
There you have it. You’re now ready to get started with Amazon PPC, and you’ll be getting off on the right foot.
To review everything we touched on:
- Start with a Sponsored Product campaign.
- First, launch an automatic campaign to get quality keywords, look at the data generated from the campaign, and make changes based on the data.
- Once you’re ready, branch out and explore all the opportunities Amazon provides sellers.
Keep in mind that this post only covers how to get started with Amazon PPC. If you truly want to become a PPC master, check out all of our content on optimizing your campaigns.